Shopify Returns Form Template: Create a PDF Customers Will Actually Use

Processing returns is already a headache. Paying a monthly fee just to let customers submit a request makes it worse. Many merchants rely on basic contact pages or text-heavy policies, leaving customers confused and support inboxes cluttered.
Finding a functional returns form template shopify merchants can use right out of the box is surprisingly difficult. Most generators only provide legal text. They miss the interactive operational form you actually need to collect order IDs and return reasons.
In this guide, we will bridge the operational gap. We are providing a complete return kit. This includes the difference between policies and forms, a downloadable printable RMA template, and step-by-step instructions to build a custom Liquid return form without expensive apps.
Let's get started.
I. Overview: Policy vs. Return Form
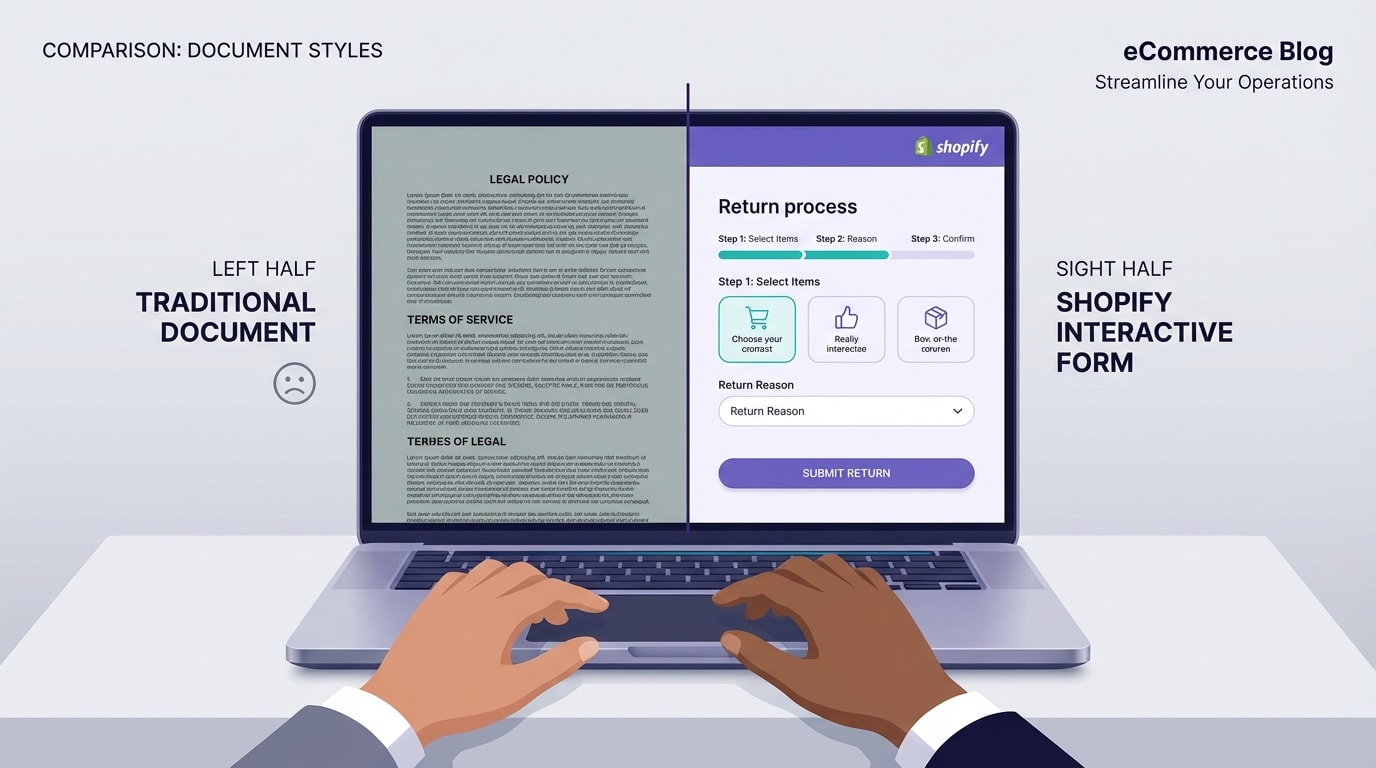
A clear return process requires both legal boundaries and logistical forms.
Let's look at the difference between your store policy and the actual return workflow.
1. The Legal Side: Your Refund Policy
Your refund policy sets the rules of engagement. It outlines acceptable item conditions and return timeframes. The EU Directive on Consumer Rights mandates a 14-day cooling-off period. Clear policies protect your business from invalid disputes. Providing proper documentation is just as critical for your bottom line. You can learn more about Maximizing Your eCommerce Sales with Personalized Invoice Templates to see how clear communication builds buyer confidence. However, a legal policy alone does not process the actual return.
2. The Logistical Side: Your Return Form
This is your Return Merchandise Authorization (RMA) form. It bridges the gap between customer intent and merchant action. A proper form collects essential data before the item ships back to your warehouse. You need specific fields like Order ID, Customer Email, Reason for Return, and optionally a photo upload.
3. Why You Need Both
Having a policy without a form causes inbox chaos. Customers will email you missing vital details, doubling your support tickets. Separating these two elements streamlines the exchange workflow. It reduces customer friction and shows high professionalism.
II. 3 Ways to Handle Returns on Shopify
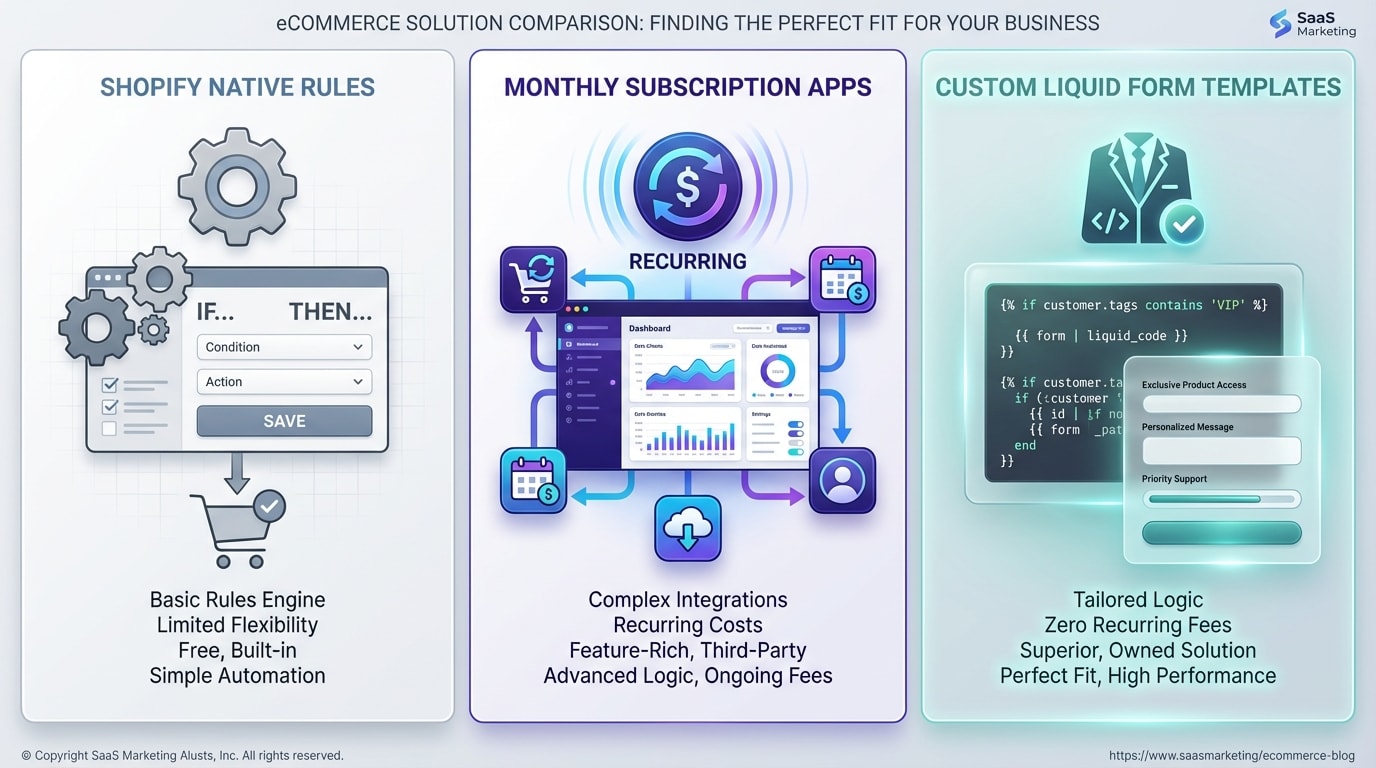
Evaluating your return management options based on budget and volume.
Here are your main choices for managing reverse logistics.
1. Native Shopify Return Rules
Shopify offers a built-in self-serve return portal. This is a great starting point for beginners. However, it requires specific customer account setups and limits visual customization. It might not work for every specific product category, like perishables or custom goods.
2. Dedicated Return Apps
Return apps provide robust automation and label generation. They are highly effective for large brands. The major downside is the recurring monthly costs for small to medium merchants. Apps are best for processing dozens of returns daily.
3. The Custom Template Route
You can use the DIY method with HTML and Liquid templates. This costs absolutely nothing in monthly fees. Using a tailored returns form template shopify setup gives you total control over the user interface and customer experience. You get exactly the data you need without paying a subscription.
III. 5 Steps to Implement Your Custom Return Form
Implementing a custom form does not require a developer. Follow these exact steps to deploy a professional, fully functional return workflow that costs absolutely nothing to maintain.
1. Download the Printable RMA PDF
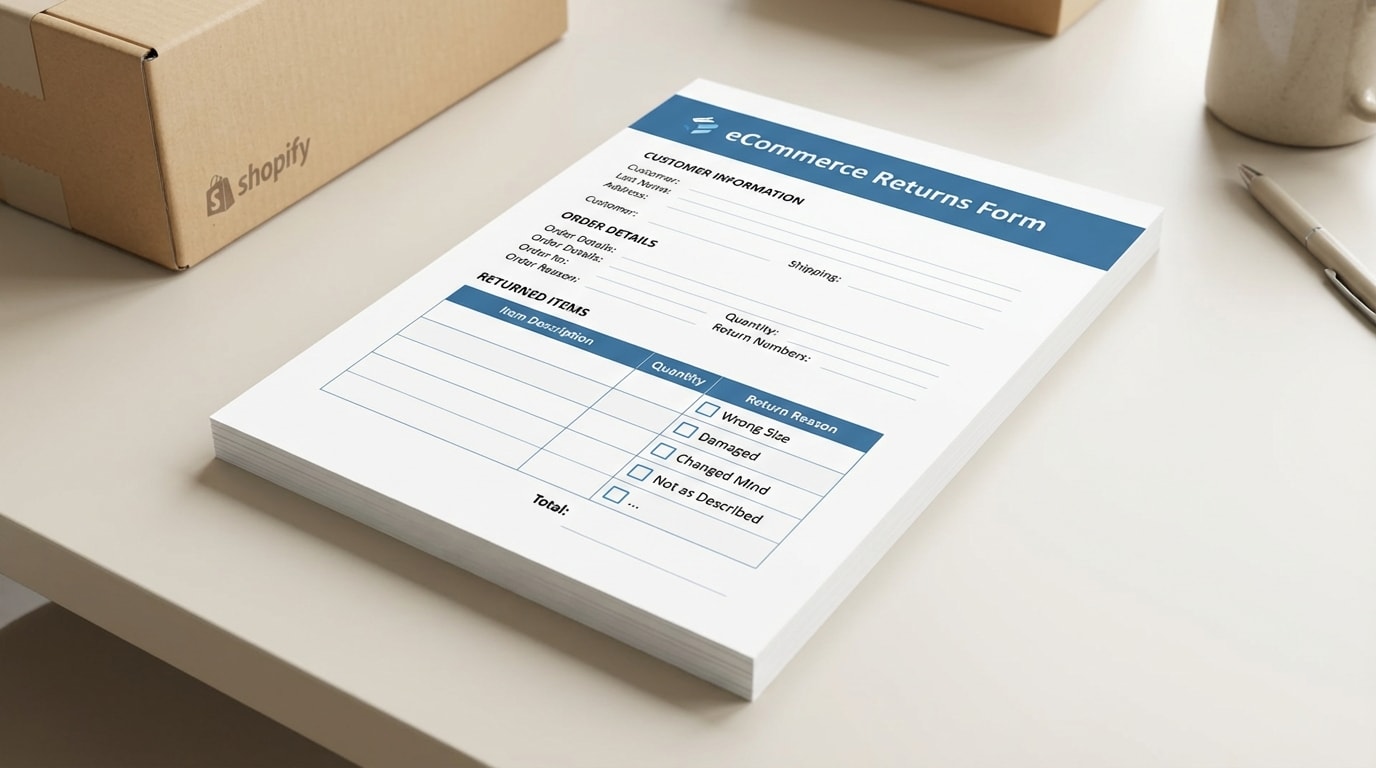
Include a physical return form inside your shipments to build immediate trust.
Providing a digital form is great, but a physical copy is highly effective.
Why this matters: A printable returns form template shopify merchants can slip into boxes reduces customer service queries by 30%. It tells the customer exactly what to do if an item does not fit.
How to implement:
- Create a standard layout: Include spaces for Order Number, Name, Item Code, and Return Reason.
- Add return instructions: Clearly state your return address and timeline directly on the paper.
- Host the PDF: Upload this file to your Shopify Admin and link to it on your digital policy page so customers can print it at home.
2. Create a New Page Template in Shopify
Setting up a dedicated page ensures your return form is kept separate from standard inquiries.
Here is how to do it:
- Navigate to your theme: Go to Online Store, select Themes, and click Edit Code.
- Add a new template: Under the Templates folder, click Add a new template. Choose page and name it returns.
- Set up the foundation: This creates a clean slate. You can insert custom HTML specifically for returns here, keeping it completely separate from your standard contact page.
3. Insert the Custom HTML/Liquid Code

Paste your custom form code directly into your new page template.
Paste your custom form code directly into your new page template. This is the core of your strategy. You need a form that posts data directly to your Shopify customer service email.
Why this matters: Using standard Shopify Liquid form tags ensures the submission is natively recognized and secure.
How to implement:
- Open the form: Start your code with
{% form 'contact' %}. - Add essential fields: Include text inputs for name and email. Most importantly, add an input for
contact[order_number]. - Add a dropdown: Use a
<select>tag for the return reason. Include options like Wrong Size, Defective, or Changed Mind to structure the data you receive.
Pro Tip: Always make the Order Number field mandatory by adding required="required" to the HTML tag. This prevents customers from submitting vague requests that slow down your support team.4. Add Professional CSS Styling
Customers judge the credibility of your store by the look of your return portal.
Why this matters: A standard, unstyled HTML form looks unprofessional. A beautifully styled interface builds confidence that their refund is in safe hands.
How to implement:
- Space it out: Add padding and margin to your input fields so they match your theme's native aesthetic.
- Clear call-to-action: Style the submit button to match your primary brand color.
- Mobile responsiveness: Ensure the form inputs scale to 100% width on mobile devices. Over 60% of returns are initiated from smartphones.
5. Automate Return Invoices with Fordeer
Once the return is approved, you need to process the logistics and update the financial records. Understanding The Importance of Invoice Templates for Small Businesses is crucial for keeping your bookkeeping accurate during refunds.
Why this matters: Customers want immediate proof that their return is being processed. Issuing a credit note or a revised invoice gives them peace of mind and keeps your accounting clean.
How to implement:
- Generate Credit Notes: Use the Fordeer PDF Invoice Generator to automatically create and send a credit note once a refund is processed.
- Provide Exchange Documentation: If the customer opted for an exchange, automatically send them an updated commercial invoice for the new item.
- Stay Compliant: Fordeer ensures your return documentation complies with regional tax laws. It automatically adjusts VAT or sales tax based on the refunded amount.
IV. Where Does the Return Data Go?
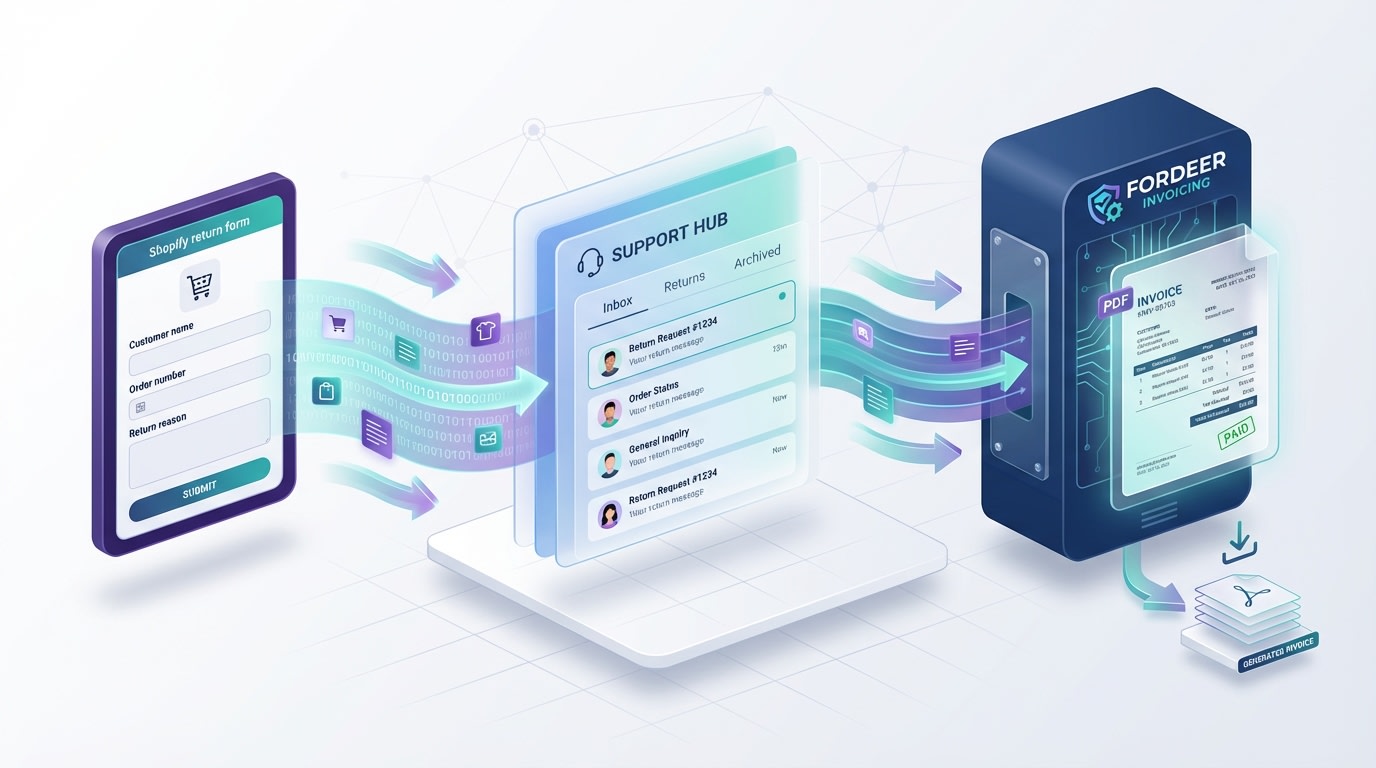
Understanding the backend flow of your custom return form.
Understanding the backend flow of your custom return form is vital for fast processing.
1. The Default Destination
Submissions from standard Liquid contact forms go directly to the Sender Email configured in your Shopify Admin. Find this under Settings, then Notifications. Check this inbox frequently or set up forwarding rules to your main helpdesk software.
2. Organizing Your Inbox
Use email filters to maintain order. Set a rule in Gmail or Outlook for subject lines starting with New customer message. Filter messages containing the word Return or Exchange into a high-priority folder.
3. Setting Up the Next Steps
Establish a clear internal Standard Operating Procedure. Upon receiving the email, verify the order ID first. Next, send a pre-filled return shipping label to the customer. Finally, trigger the Fordeer invoice update to formally document the return process.
V. Conclusion
So there you go. Providing a smooth return process does not require expensive monthly subscriptions. By understanding the difference between your legal policy and operational needs, you can easily build a system that works. Implementing a custom returns form template shopify setup gives you total control over the customer experience while keeping overhead costs at zero.
You do not have to tackle everything at once. Start by offering a printable PDF form. Then transition to a fully custom Liquid page when you are ready to scale your support operations.
Follow the Fordeer Team for more useful updates!
- Install Fordeer Apps for Free
- Get immediate assistance by chatting with us
- Join Fordeer Commerce Community for fresh app updates, expert tips, and private deals.

