Exclusive & Limited Edition Badges for Shopify Product Drops


There is nothing quite as exhilarating or stressful as a timed product drop. But when thousands of shoppers flood your store, static images are not enough to guide them. If exclusive items are not clearly marked, or worse, if badges break your mobile layout, you risk frustrating buyers and losing hard-earned momentum.
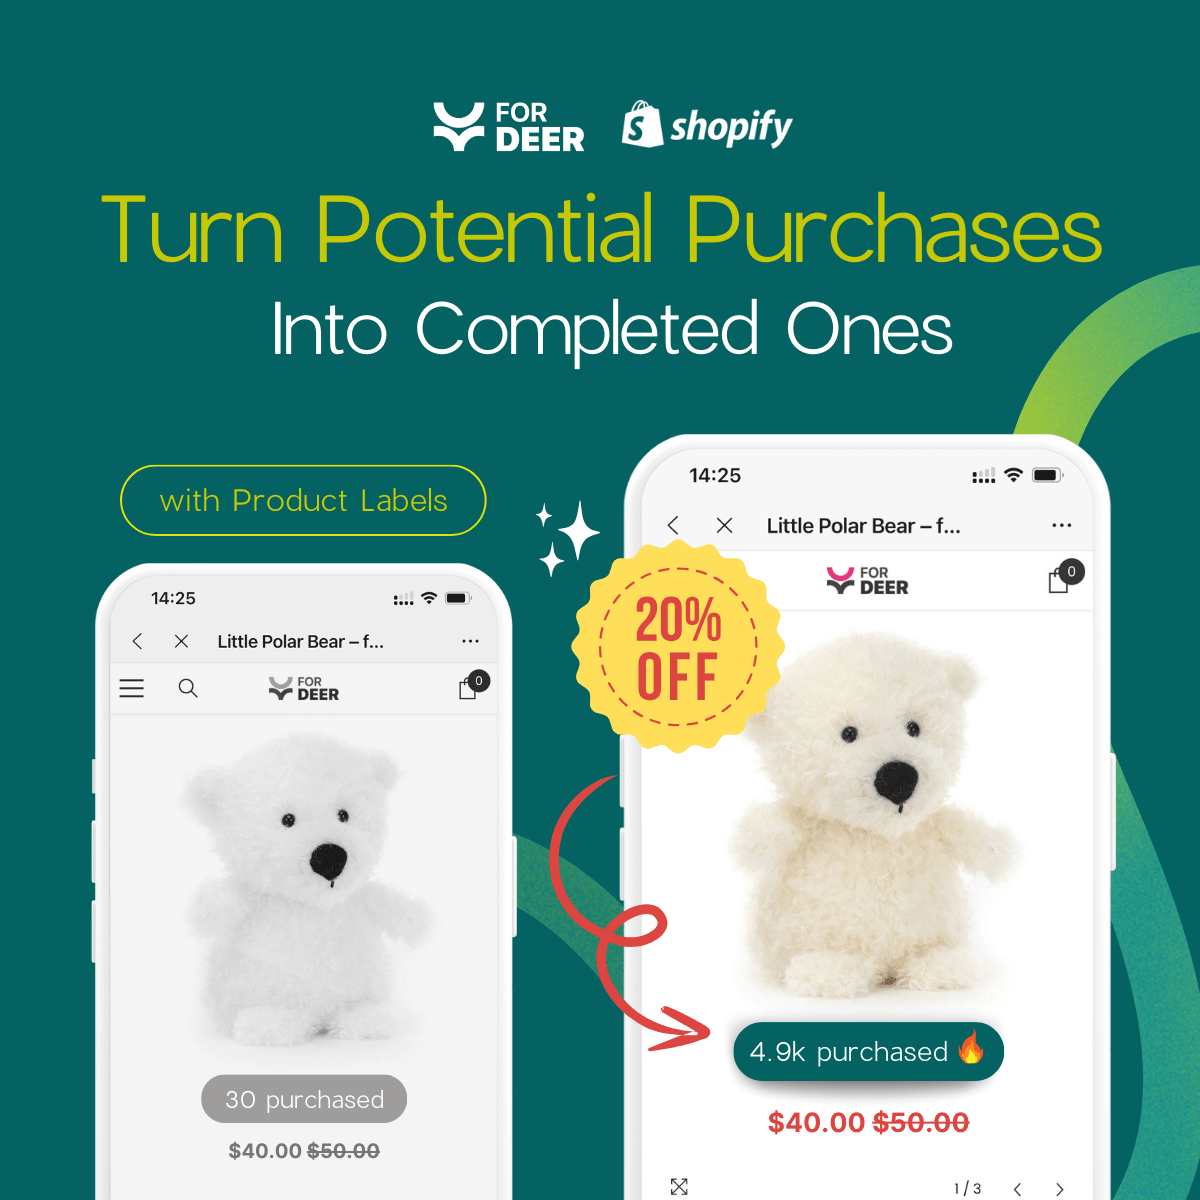
Creating a successful Shopify exclusive label badge product drop strategy requires more than just slapping a new sticker on a thumbnail. Recent eCommerce benchmarks reveal that strategically placed product badges can increase conversion rates by up to 15-20% by creating authentic urgency. For mid-funnel merchants, the challenge is not whether to use badges, but how to automate them flawlessly.
In this guide, we will break down the exact technical methods to implement badges, dive into six advanced strategies to maximize buyer urgency, and share essential UX rules to keep your store fast and mobile-friendly.
Let's get started!
I. Three Ways to Add Badges to Your Shopify Store

Choosing the right badge implementation method depends on your technical comfort and automation needs.
Before launching your next collection, you need to determine exactly how your theme handles visual merchandising. Here are the three main approaches.
1. The Native Theme Approach
Most premium Shopify themes include basic settings for product labels. You can typically activate a standard sale or sold-out tag directly within your theme customizer.
Why this works: It requires zero technical knowledge and works immediately out of the box.
The limitation: Native themes rely heavily on manual Shopify tagging. If you have a massive product drop at midnight, you will have to manually add tags to every single product to trigger the badges. This lacks the dynamic timing needed for fast-paced exclusive drops and opens the door for costly human errors.
2. Liquid Code Snippets
For brands that want an ultra-lightweight setup without installing extra plugins, editing your theme code is the next step. This involves opening your product-grid-item.liquid file and writing conditional statements to display custom tags.
Why this works: Hardcoding badges keeps your site speed blazing fast. You have complete control over the CSS and HTML structure.
The limitation: Managing multiple drops becomes a maintenance nightmare. Every time you want to change the badge design, color, or trigger condition, you have to push new code. This bottlenecks your marketing team by making them rely on a developer for simple visual changes.
3. Automated Label Apps
Using a dedicated app like Fordeer or DECO bridges the gap between speed and marketing flexibility. These apps inject lightweight scripts that handle the complex logic of when and where to show specific images.
Why this matters: Apps offer visual merchandising automation that native themes cannot replicate. You can set rules based on inventory data, specific dates, or customer tags. If you want a deep dive into setting up these visual triggers, check out our guide on how to use product labels to highlight special offers on Shopify.
By using an app, your marketing team can schedule a weekend drop on Friday afternoon and let the software handle the visual transitions entirely hands-off.
II. 6 Strategies to Maximize FOMO During a Product Drop
The visual layer of a product drop must be backed by real-time data to build authentic urgency and trust with the buyer. Here are six ways to execute this flawlessly.
1. The Scarcity Sync: Automate Badges with Inventory Levels
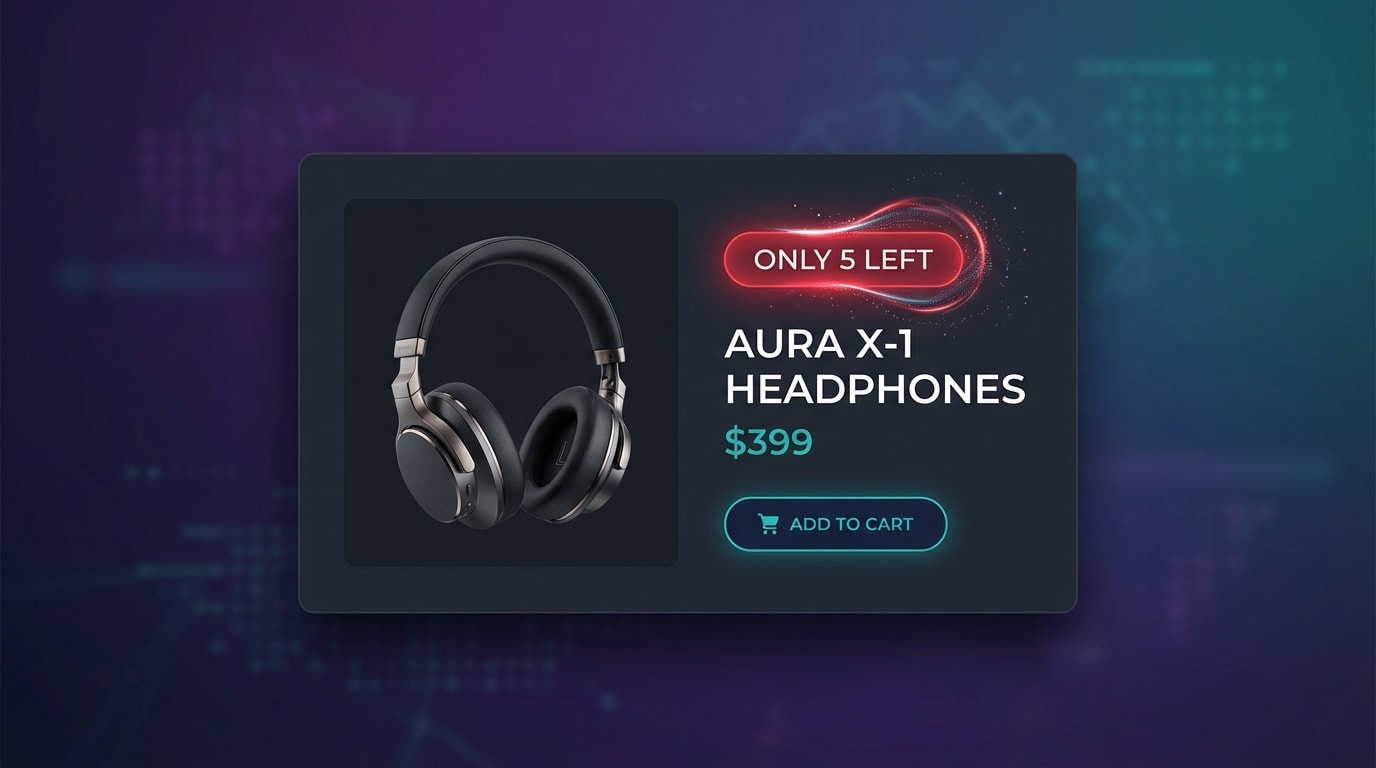
Authentic scarcity converts better than generic urgency labels.
Most competitors treat badges as static images rather than dynamic data points. For a high-stakes drop, you need a scarcity sync. Displaying a real-time inventory badge prevents overselling while triggering intense, authentic FOMO.
Here is how to implement it:
- Set variant triggers: Configure your label app to read variant inventory levels in real-time.
- Define the threshold: Trigger a low-stock badge only when inventory dips below 10% of the original drop allocation.
- Automate the switch: Ensure the badge automatically swaps to a grayed-out sold-out overlay the second inventory hits zero.
By syncing badges directly to inventory, you transition from basic graphics to an automated conversion strategy.
2. Schedule Tags Using Published At Logic
Manually turning on new tags at the exact minute of a product drop is a recipe for disaster. Late nights and manual data entry lead to mistakes.
Here is how to automate it:
- Rethink the trigger: Instead of using manual tags, build a rule based on the product's publish date.
- Set the expiration: Program the exclusive drop badge to automatically disappear 48 hours after the publish time.
- Maintain store cleanliness: This ensures latecomers do not see stale labels weeks after the drop has ended. This protects your brand's premium reputation.
3. Sync Countdown Timers with Badge Visibility
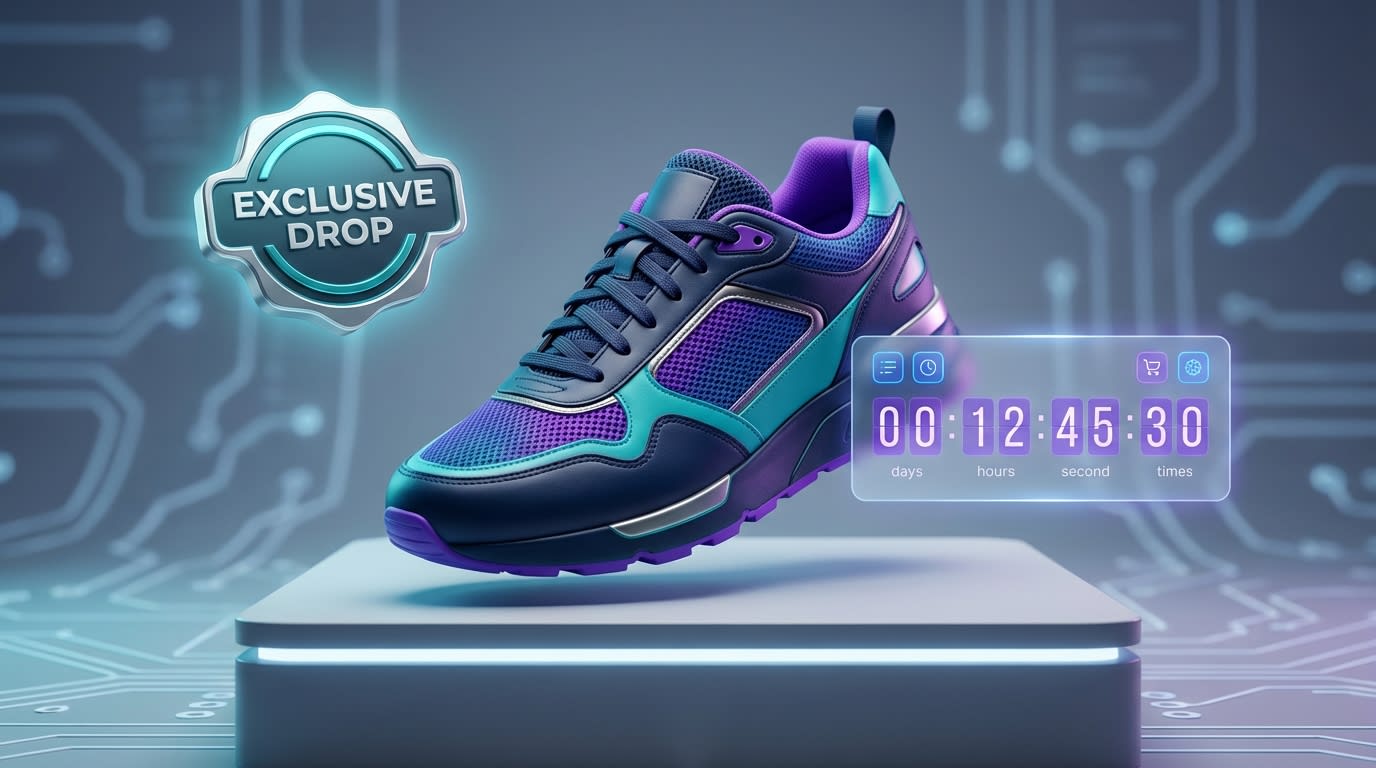
Transition shoppers from MOFU research to BOFU action with synchronized countdowns.
A badge tells your customers what the product is. A countdown timer tells them exactly when they will lose it. The combination of both is a massive conversion driver.
Here is how to sequence it:
- Pre-drop: Use a teaser badge paired with a countdown to the launch hour.
- Live drop: The moment the timer hits zero, auto-switch the badge to your live-now design.
- Post-drop: If the item does not sell out immediately, transition to an ending-soon badge 12 hours before the cart closes.
Pro Tip: Align your badge transitions exactly with your email and SMS marketing blasts to create a cohesive omnichannel experience.
4. The Invisible Badge: CSS for Logged-In VIPs
If your product drop is meant to reward loyal customers, the general public should not see the exact same shopping experience. Exclusive member-only badges make VIPs feel valued while protecting your gated inventory.
Here is how to set it up:
- Customer tagging: Ensure your most loyal buyers are tagged as VIP in your Shopify admin.
- Conditional logic: Render the VIP exclusive badge only if the customer tag matches your criteria.
- Teaser effect: Show a locked padlock badge to non-logged-in users. This drives immediate account registrations prior to the drop.
5. Dynamic Discounting Based on Badge Status
If you are running a tiered product drop with early bird pricing, your badges must visually communicate the financial incentive clearly. Disconnects between the product page and the checkout cart cause immediate abandonment.
Here is how to align them:
- Tier 1: Display an early-bird 20% off badge for the first two hours of the drop.
- Tier 2: Automate a swap to a standard drop badge once the discount timeframe expires.
- Checkout alignment: Ensure the badge text perfectly matches the automatic discount name applied at checkout. The result? Zero confusion and higher conversions.
6. A/B Test Badge Placement Psychology
Where you place your product image overlay completely alters how a user scans the thumbnail. UX research from the Baymard Institute shows that placement drastically affects visual hierarchy.
Here is where to place them:
- Top-Left: Best for crucial status updates. This aligns with Western reading patterns, guaranteeing the badge is seen before the product.
- Top-Right: Best for secondary incentives like free shipping or warranty details.
- Center Overlay: Reserve this exclusively for completely out-of-stock items. A large center badge prevents further clicks on dead inventory and saves the user time.
III. Essential UX Rules for Product Image Overlays
A badge that ruins your mobile layout will hurt conversions more than it helps.
As you build your product drop workflow, keep these critical technical considerations in mind to ensure a smooth user experience.
1. Preventing Broken Layouts on Mobile
One of the most common complaints from Shopify merchants is badges covering crucial product details on small screens. You cannot afford a broken layout during a massive traffic spike.
- Use relative sizing: Never use fixed pixel sizes for badges. Ensure your app or CSS uses percentages so the badge scales down perfectly on mobile devices.
- Margin checks: Add padding to your product photography. Ensure the safe zone for badges does not overlap with the main subject of the image.
2. Optimizing for Site Speed
Slow site speed caused by heavy badge scripts will kill a product drop before it even starts. Every millisecond counts when thousands of buyers are refreshing your page.
- Format matters: SVG labels always beat PNG stickers. SVGs are infinitely scalable, weigh mere kilobytes, and load instantly.
- Lazy loading compatibility: Ensure your badge app injects its code seamlessly with your theme's lazy-loading image settings. Badges should not pop in seconds after the product image renders. For more ways to optimize your visuals without sacrificing performance, explore these creative ideas to utilize Shopify product badges to attract customers.
3. Geo-Targeting Regional Drops
If your exclusive label drop is restricted by licensing agreements or shipping constraints, your badges must reflect this reality.
- Location logic: Use geo-targeting rules to hide available-now badges from IP addresses outside your shipping zones.
- Clarity: This prevents international customers from clicking into an exclusive product only to be rejected at checkout. It saves your customer support team from a flood of angry tickets and protects your conversion rate data.
IV. Conclusion
Executing a Shopify exclusive label badge product drop is about much more than visual flair. By migrating away from manual tags and embracing inventory-synced automation, publish-date logic, and mobile-responsive overlays, you protect your site's performance while maximizing authentic FOMO.
You do not have to be a developer to run a flawless product drop. By choosing the right automation tools, you can ensure your store is completely ready to handle the traffic, drive urgency, and convert browsers into buyers.
So there you go—your complete roadmap to mastering product drops with strategic badges. Start with the areas where you need the most help and scale up your automation from there. You've got this!
Follow the Fordeer Team for more useful updates!
- Install Fordeer Apps for Free
- Get immediate assistance by chatting with us
- Join Fordeer Commerce Community for fresh app updates, expert tips, and private deals.

