How to Add a Preorder Button on Shopify Product Pages

You want to capture sales before stock arrives, but nothing kills conversion faster than a confusing checkout experience. Many merchants try to hack their product templates, only to realize their normal add to cart functionality is broken or their accelerated checkouts stopped working.
When you add a preorder button on Shopify, you are doing more than just changing a line of text. You are fundamentally altering your inventory logic. While the Shopify admin allows you to check a box to continue selling when out of stock, displaying the right button at the exact right time requires a strategic setup.
In this guide, we will help you avoid the common hybrid inventory trap. You will learn exactly how to implement pre-orders safely using Custom Liquid code for Dawn and Online Store 2.0 themes. We will also show you how to leverage automated apps to scale without the headaches.
Let's get started!
I. Overview: The Hybrid Inventory Trap

Treating pre-orders and back-orders the same can lead to unhappy customers and chargebacks.
1. Pre-order vs. Back-order
A true pre-order means the product has never been in stock. You are launching a brand new item soon and want to build hype. A back-order means a standard product is temporarily out of stock but being replenished by your supplier.
Most competitors miss this vital distinction. The standard Shopify inventory settings treat both scenarios as a single toggle. You simply check a box to continue selling out of stock. This creates a massive problem for customer expectations, as buyers have different urgency levels for a hyped new launch versus a basic restock.
2. The Risk of Bad Automation
When inventory states overlap, your fulfillment process breaks down. The immediate danger here is selling items you cannot actually restock in time.
Manual code often fails to differentiate between these two distinct buyer journeys. If a customer buys an in-stock shirt and a pre-order hat in the same cart, your shipping logic gets extremely complicated. Your basic code might accidentally label everything in the cart as a pre-order, delaying the shipment of items you actually have sitting on your shelves.
3. Business Impact
This confusion leads directly to increased support tickets. Customers will email you daily asking where their specific items are.
Displaying accurate shipping timelines protects your bottom line. Moving beyond basic theme toggles stops these frustrating chargebacks before they happen. It builds trust, protects your merchant account standing, and keeps your customer service team from burning out over preventable order inquiries.
II. Manual Code vs. Pre-Order Apps
Choosing between manual theme edits and app automation depends on your catalog size.
1. The Manual Route (Custom Liquid)
This involves using Shopify Online Store 2.0 features to add a pre-order button on Shopify without an app.
- Pros: It is completely free. There is no app bloat slowing down your store speed. This works exceptionally well for stores running only one or two exclusive product drops per year.
- Cons: It requires high maintenance. The button does not update automatically when your stock hits zero or when inventory arrives. You have to edit Liquid code snippets directly in your theme files.
- Verdict: This route is best for highly technical merchants running limited, one-off product launches where inventory tracking is managed entirely manually.
2. The App Automation Route (Fordeer)
This involves using a dedicated solution like the Fordeer PreOrder Now PreSale app to handle the logic.
- Pros: It automatically swaps the button text based on real-time inventory levels. It seamlessly handles partial payments, displays expected shipping dates, and includes mixed-cart warnings for buyers.
- Cons: Finding a reliable Shopify pre order app free option can be confusing without clear guidance in the app store.
- Verdict: This is the safest choice for growing stores. You get completely hands-off automation, avoid breaking your live theme, and deliver a polished customer experience.
III. 5 Strategies to Implement and Manage Pre-Order Buttons
Adding purchase options to your product page requires careful execution. Here are the exact technical and strategic steps to get your pre-order buttons working perfectly.
1. Safely Use Custom Liquid for Manual Buttons
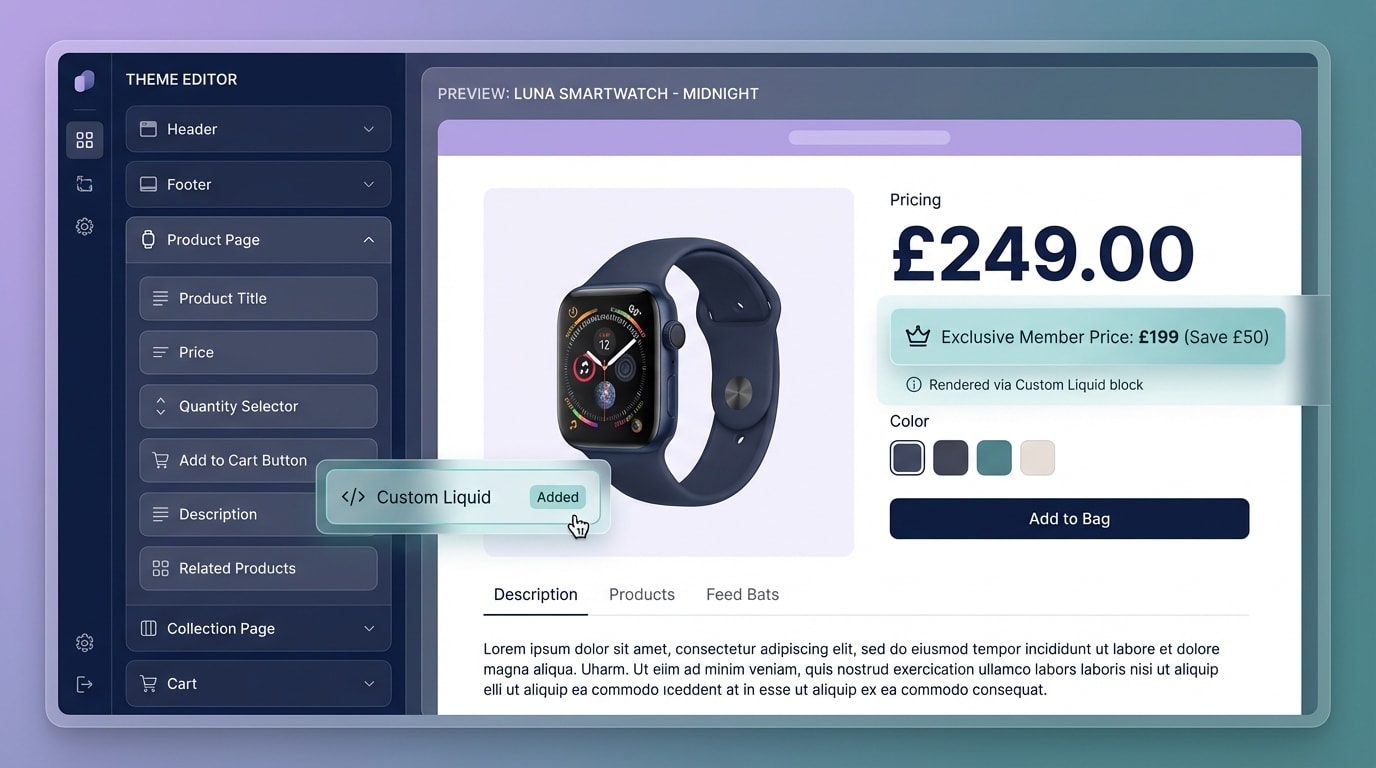
Online Store 2.0 allows you to add Custom Liquid blocks safely without altering core theme files.
Many merchants search for ways to handle a Shopify pre order without app installations. Thanks to Online Store 2.0, you do not have to break your core theme files.
Why this matters: Editing core theme files directly can prevent future theme updates from installing correctly. It also creates messy code that is hard to debug.
Here is how to implement it safely:
- Use Custom Blocks: Go to the Theme Editor. Navigate to your Default Product page template and click to add a Custom Liquid block.
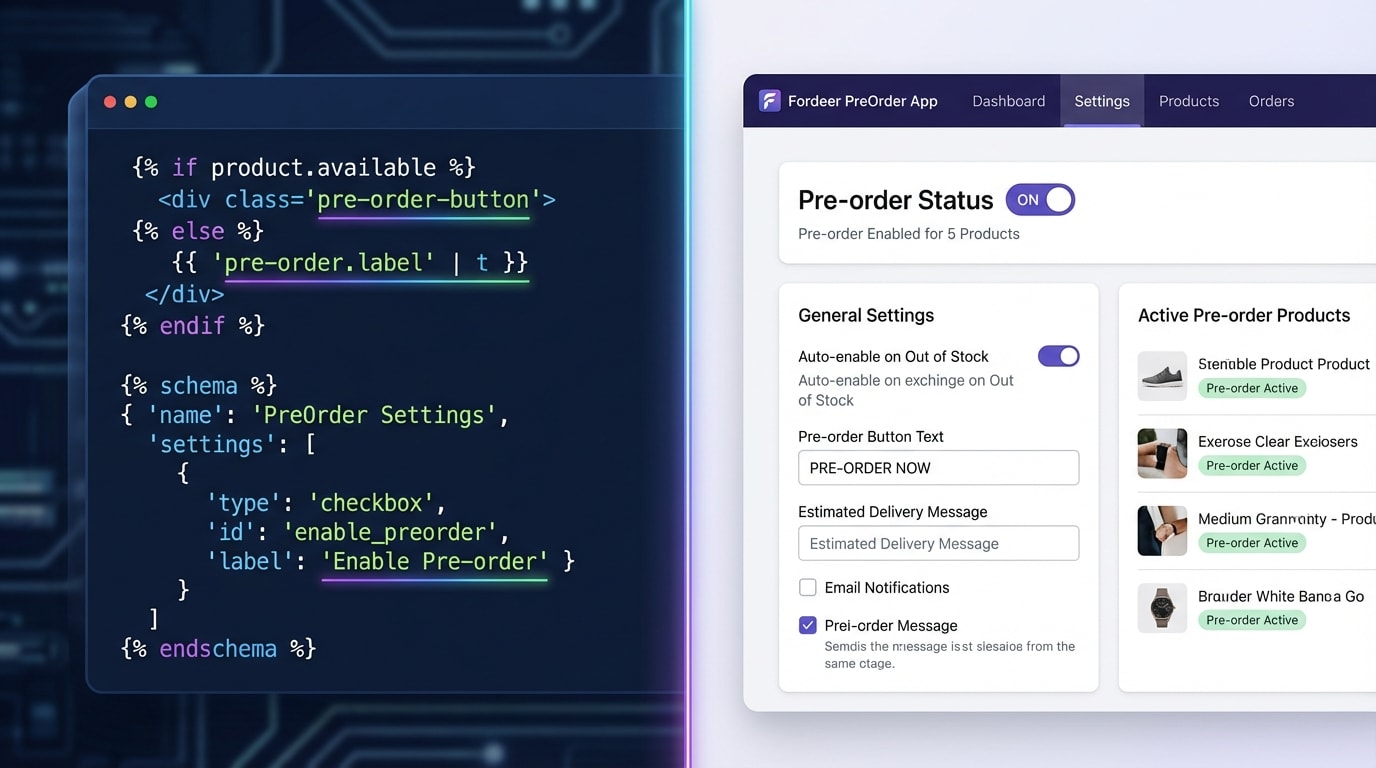
- Add the snippet: Paste a simple conditional snippet:
{% if product.available and product.inventory_quantity <= 0 %} <button class="btn">Pre-order Now</button> {% endif %}. - Hide the default button: Use basic CSS to hide the standard cart button when this exact condition is met so you do not show two competing buttons.
- Test the block: Preview your store using a product with zero inventory to ensure the new button renders correctly before publishing.
This method keeps your core files perfectly clean and easily reversible.
2. Automate Button Labels with Product Tags
Manually changing templates for every single product launch is exhausting. Human error is inevitable when managing dozens of SKUs.
Why this matters: Automating this process saves merchants an average of five hours of manual template work weekly. It prevents embarrassing mistakes like leaving a pre-order button active on an item that just arrived at your warehouse.
Here is how to do it:
- Tag your products: Add a specific tag like
preorder-activeto your Shopify admin product page settings. - Set up conditional logic: Edit your product template to look for this exact tag. If the tag is present, the button automatically renders as a pre-order option.
- Use Fordeer: Instead of writing code, use Fordeer to automatically apply these tag rules based on your actual inventory levels. The button reverts to normal the exact second your restock arrives.
For a comprehensive look at utilizing these automated tag strategies, check out A Step-by-Step Guide to Launch Successful PreOrder Campaigns to maximize your revenue before inventory drops.
3. Customize Button CSS for Brand Alignment
One of the biggest complaints about third-party apps and manual snippets is visual clashing. The pre-order button often looks completely out of place compared to the rest of the site.
Why this matters: A button that clashes with your carefully designed theme reduces buyer trust and instantly lowers your conversion rate.
Follow these steps to fix the design:
- Inspect the element: Right-click the new button on your live site to find its exact CSS class.
- Apply brand colors: Add custom CSS in your Theme Editor targeting that specific class. Match your brand background and text colors perfectly.
- Add visual cues: Consider adding a subtle border, an icon, or a slightly different shade. This visually distinguishes the pre-order button from regular immediate purchases.
- Create urgency: Use color psychology. A warm color like orange can highlight the exclusive nature of the early access purchase.
Pro Tip: If using the Fordeer app, you can easily match your theme typography and colors directly within the visual settings panel. This requires absolutely zero CSS knowledge.
4. Troubleshoot Accelerated Checkout Conflicts
Merchants often successfully add their manual pre-order button, only to find a glaring technical issue. Apple Pay, Google Pay, and Shop Pay bypass the pre-order logic entirely.
Why this matters: Accelerated checkouts do not naturally understand custom Liquid conditions. They pull default product data. This leads to inaccurate customer expectations because the buyer never sees the shipping delay warnings.
Here is the fix:
- Hide dynamic buttons: For pre-order items, use Liquid conditional tags to completely hide the dynamic payment button output.
- Force the cart route: Ensure customers must pass through the standard cart page. They need to see and accept your pre-order terms before hitting the final checkout screen.
- Leverage the API: Utilizing a certified Shopify Purchase Options API app prevents these wallet conflicts automatically by communicating the order type directly to Shopify checkouts.
5. Cleanly Remove Ghost Pre-Order Buttons
A common headache is figuring out how to remove Pre order on Shopify after a big campaign ends. You might find a ghost button lingering on the page that does nothing when clicked.
Why this matters: Leftover code creates dead clicks. This deeply frustrates shoppers trying to buy in-stock items, causing them to abandon their carts entirely.
How to clean it up:
- Check the Theme Editor: Remove any Custom Liquid blocks you manually placed during the campaign setup.
- Revert theme files: If you edited your main product file directly, use the version history dropdown in the code editor. Revert to the exact timestamp before your custom edits.
- Clean uninstall: If you tested a free pre-order app and deleted it, check your theme files for leftover snippet includes. Safely delete those specific lines so they stop trying to load missing files.
- Clear your cache: Always clear your browser cache and refresh your live page to confirm the old buttons are permanently gone.
IV. FTC Compliance & Expected Shipping Dates
Displaying accurate shipping timelines is not just good customer service: it is legally required.
Adding a functional button is only half the battle. You also need to ensure your messaging complies with strict consumer protection laws. Executing a 5-Step Preorder & Presale Strategy to Build Customer Loyalty on Shopify requires careful attention to these legal details to avoid massive fines.
1. The FTC 30-Day Rule
According to the Federal Trade Commission, merchants must have a reasonable basis for expecting they can actually ship the product within the advertised time frame. If you do not explicitly state a date on the product page, the law dictates you must ship the item within 30 days of receiving the order.
2. Communicating Delays
If a timeline changes due to unexpected supply chain issues, you are legally required to notify the customer immediately. You must offer them a clear chance to consent to the new delay or cancel the order for a full, prompt refund. Ignoring this rule can result in payment gateway bans.
3. Best Practices for UI
Always display the exact expected ship date directly above or below the button. Apps like Fordeer allow you to place dynamic, automated date messages right on the product page. This keeps you fully compliant and keeps your customers happy and informed.
Conclusion
So there you go. Whether you choose to write custom Liquid blocks or use a fully automated app, adding a pre-order button on Shopify is entirely within your reach. Managing the hybrid inventory trap does not have to be a nightmare if you use the right conditional logic and stay compliant with required shipping dates.
You have the power to secure critical revenue before your stock even arrives at the warehouse. By automating your buttons and managing customer expectations clearly, you will turn out-of-stock anxiety into a highly profitable launch strategy. You've got this!
Follow the Fordeer Team for more useful updates!
- Install Fordeer Apps for Free
- Get immediate assistance by chatting with us
- Join Fordeer Commerce Community for fresh app updates, expert tips, and private deals.

